• Welcome to Overclockers Forums! Join us to reply in threads, receive reduced ads, and to customize your site experience!

Project: Infection

Overclockers is supported by our readers. When you click a link to make a purchase, we may earn a commission. Learn More.

Drew@PSU

Member
Joined
May 29, 2006
So, if you couldn't tell, I'm a big fan of 28 Days Later ( imdb ). That's what my avatar is ( still need to fix it some more ), and its also my background ( see the attached pic ).

Now try to imagine that background, only as the theme for my computer. I absolutely love the saying, and its in the movie at some point ( Edit: 13:42-14ish ). I have the unedited version if someone wants it, although it's probably still on the site.

ANYWAY! Computer stuffs!
So I'll be taking the first rig in my sig ( R.I.M.S.? ) and putting it all in a Lian-Li PC-G70B. Then I'll add in a water cooling loop consisting of a Thermochill PA 120.3, MCP-655B, Apogee GT, MCW-60, MicroRES, tubing, and a bunch of panaflos! The one connected to the TV will go into my current case ( a TT Swing, not too bad, but a little small for the current project ). The case will have a window so a couple of CCFLs ( red ) are in order, along with a UV one.

Why UV you ask? To kill the infected of course...ok, so I'll be using Fluid XP -EXT SuperWhizbang or whatever the latest incarnation is, since they have a "Blood Red" UV reactive flavor. I'll dilute it with some DI water. I'll also be putting a biohazard etching type sticker on the window, then the message from the background on the window with UV paint, so that you can only see it with the UV CCFL on. I'm hoping that you won't be able to see the bio symbol quite as much with the UV on only, but we shall see ( or not, depending ).

The rest of the case gets a black spray painting ( flat me-thinks, although a better artist can probably convince me otherwise ), and black cables for the most part. I'll attend to the sleeving of the squid PSU at a later point. The rad will go into the bottom of the case, along with the pump, with the res above the pump and rad ( alongside the HDD rack kinda ).

And towards the end of this I'll throw in an 8800 GTsomething ( still deciding, although leaning towards the GTX with a step-up :D )

Here's a quick part list:
Lian-Li PC-G70B
Thermochill PA 120.3
MCP-655B
4x Panaflo Ultras
Sunbeam Rheostat
Apogee GT
MicroRES
Tubing ( Tygon for the final build, some cheap stuff to figure out the bends and such )
Fluid-XP
MCW-60
DI Water
Worm Drive Clamps
DD Fill port ( tube to the top so I can fill it without taking the case apart, this unnecessary? )

I'll post some pics of the rig to go into the wonderful case as soon as I post this and then I'll edit them in ( gotta finish writing this or it won't get done! ).
Rig 1 is the one in the case, and the HTPC is obviously the other one ( a shame the PCP&C wouldn't fit in the Swing )

Also, how do you get the line lengths slightly smaller? It looks so ugly written this way. Same with the pics, this is an ugly post :(
 

Attachments

  • nighSFW.jpg
    nighSFW.jpg
    36.7 KB · Views: 1,638
  • htpc.jpg
    htpc.jpg
    45.1 KB · Views: 1,537
  • rig1.jpg
    rig1.jpg
    29.7 KB · Views: 1,540
Last edited:
Well, I just ordered the majority of the parts, the case from Performance PCs and the loop equipment from JT. I'm going out to Home Depot/Lowe's tomorrow and picking up a dremel, along with some worm drive clamps and cheap tubing to do the layout. I can't wait for this stuff to come in :D
 
Finish it. I really want to see it.

Side note: do you know when 28 Weeks Later will come out on DVD? I wanted to see it so bad, but it disappeared from the theatres before I could.
 
First, to firejunior88, October 9th!

Second, Update!

Yes, believe it or not, I actually purchased my parts. I'm surrounded by expensive things I barely know how to use! Sweet!

I'm going to clean the parts and prep the bottom of the case today hopefully, then I suppose I'll do assembly tomorrow, and leak test.

For now, take a gander. When I'm done mutilating the case, I'll post up some more pics of how the mutilation turned out.
Drew

Edit: Is it easier to use the cut-off wheel to remove rivets or drill them out? I've been drilling for about 5 minutes now ( oil and a dremel bit ) and it doesn't seem to be doing the job. I'm going to remove the head of the rivet inside the case, I guess I'll see if that does the job...wish me luck!
 

Attachments

  • case.jpg
    case.jpg
    19 KB · Views: 1,423
  • goodies.jpg
    goodies.jpg
    21.5 KB · Views: 1,446
Last edited:
That's a can do Halo 2 ( I know, I'm lame, that's why I don't write novels :D )
So, I finished part of the mutilation, got the bottom all prepped. It's ready to get the radiator, uh....area?...all cut out so I can pull air in the bottom. I also flipped around the LEDs on the Sunbeam Rheobus, *takes picture*, yeah, they were a pain to do, especially the ones on the sides, BUT! I persevered and I got that ready, so, on to the Pics!

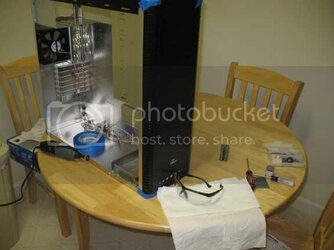
Here's where I work ( wish I had a workshop :( )
workspace.jpg

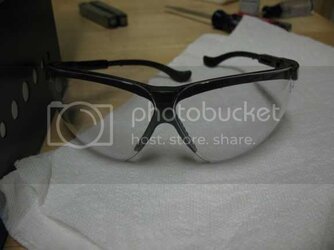
Safety first!
safetyglasses.jpg

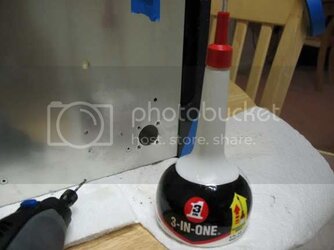
And always lube up :bday:
oil.jpg

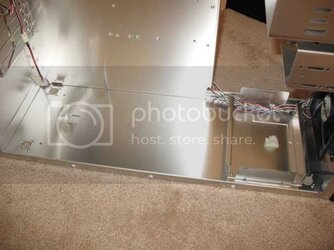
Before:
before.jpg

And after:
alldone.jpg

It boggles the mind as to why they put that neat little PC Speaker holder on with an adhesive pad, but its the only dark spot I've found in a wonderful case.

Here's the sunbeam ( macros are annoying with this camera ):
sunbeam.jpg

Those LEDs were a pain to pull out and switch around.

Next up in the list of things to do is to is to cut out the area for the rad, figure out precisely where I'm going to put the res and how to attach it, and manage something to get the pump slightly higher than the rad itself.

Shame I have to work, can't they just give me the money anyway? :beer:
Laterz,
Drew
 
Ok, so I think I'm going to have to re-arrange and put the Rad at the top of the case, as during layout, I realized there's really no room for the pump on the same level as the rad. This rather precludes my choice of setup, as pumps tend not to work best upside down : /. Attached is a picture of the "oh crap..." moment, or at least a recreation....one would have thought I could think ahead better.

IMG_0095.jpg

I'm thinking that I could remove that front fan and pass the tubing through the 3.5 cage....somehow....then I have to figure out where to put the rez, this was all so much easier in my head : /.

I may windup doing the SuperDave idea and placing at the top, although that's not what I really want, I'm not super creative unfortunately...

Edit: Wooo!!! Four stars! :bday:
 
Last edited:
That's not a bad idea, obviously this thing will weigh far too much to move that often, so I suppose I could grab some screws and find one of the 8 million extra pieces to put on the back as a holder, or something, I'll have to look into that, thanks. :D
 
At the moment its on hold till I can grab a hole saw bit this weekend, but after that, I'll get it all together and bled, finally..

Edit: Check that, gotta grab a working proc AND/OR mobo first, but I swear, sunday, I will cut holes, I promise! Gotta man up to cutting a $300 case first though...: /
 
Last edited:
Update!

Ok, back from the dead, I have actually completed some work, met and overcame some challenges and got some new ideas.

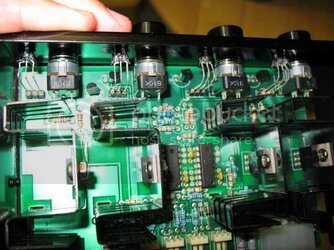
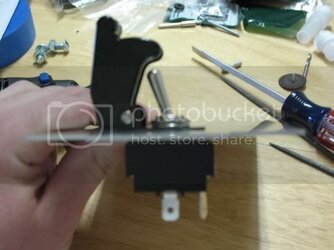
I put in a switch to control both of the CCFLs I'm putting in. I'm still trying to figure out the macro setting on my camera evidently...
switch.jpg
It remains to be seen whether or not I'll use both the UV and the Red, depends how they look. Some might say UV/Red and Black is overdone, but they ain't seen nothing yet :)

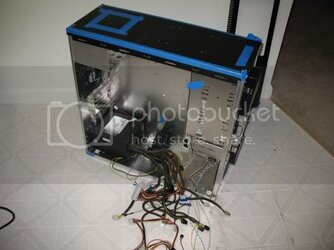
I finally manned up to cutting my case. If you have a Lian-Li, you should not look at the next two pictures.


This is at the very last "readjustment" with the dremel and drill bit. Next time I'm taping a template on, or making one out of an old case.
holes.jpg

Ok, so it really didn't turn out as bad as I thought it would, but there are much nicer versions of the same thing elsewhere. If I took a better pic, you'd see the holes to the left side are more like slots, its terrible.
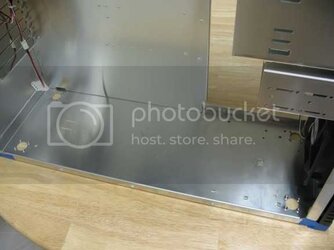
clean.jpg

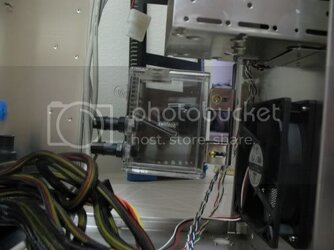
I put the res in and got it hung up. In fact you might say its well hung. Nuck nuck nuck.....
res.jpg

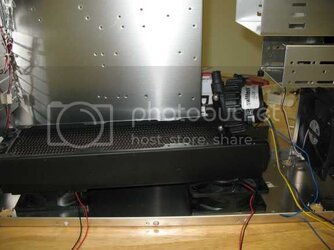
Next up is cutting the tubing for each run and nailing down the placement of the pump, obviously there aren't many places for it to go at the moment, but I'm going to drill some holes in the floor to bolt it down.
placement.jpg

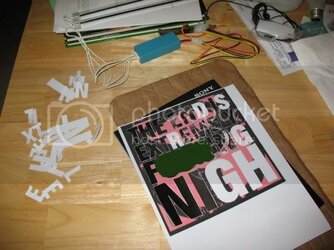
I decided that I wanted to get the applique and the UV saying on the window sooner rather than later, so I set about making a template the right size. I blew up the requisite section of the wallpaper and preceded to cut out the letters. Also, at the top of the pic you can see the 2 UV CCFLs and the inverter for them. There is an switch that fits in a PCI bracket which I'll use to control whether I want both the UV and the red spots on, or either or.
nigh.jpg

That took HOURS. I played through 2 or 3 movies while I cut the letters out with a utility knife. If there is an easier way to do this, please don't tell me until I finish. It will preserve the "hard work well done" factor of my sanity.

I've also gotten to really enjoy the feeling of taking something, looking at it and going, "Huh, I could use this for something". Then cutting, chopping, drilling, etc. until its doing something somewhere or someway other than intended. Like putting in that switch? Yeah, I giggled at how cool I thought that was for at least 15 minutes. Probably why I don't get a lot of work done on this.

As for what's next, the UV stuff needs to get tested and refined, I need to throw my system back together and make sure it all works now that the mobo is back, cut out the outlet for the rad on the top of the case, and grab some modder's mesh to cover the top with. That's quite a list I've got for myself, so we shall see how much I actually accomplish in the meantime.
-Drew
 
That took HOURS. I played through 2 or 3 movies while I cut the letters out with a utility knife. If there is an easier way to do this, please don't tell me until I finish. It will preserve the "hard work well done" factor of my sanity.

I know you said not to tell ya if there was an easier way, but i'm gonna. Two words Vinyl Cutter, takes an image on the pc, traces its path, then cuts it out on the vinyl to give you a perfect stencil. Check out a few vinyl stencils from my recent project: designs - cutouts, took about 4 movies to cut and weed (weed means to take out all of the excess vinyl from the stencil) all of the pieces. PM me if you have any other letters or designs you need cut, maybe i could help you out. The case looks great so far tho, keep it up!
 
Ok, some progress has been made...

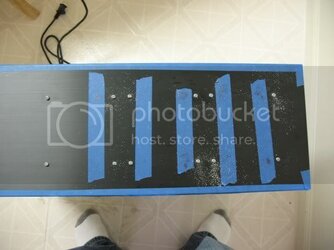
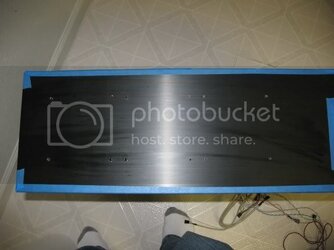
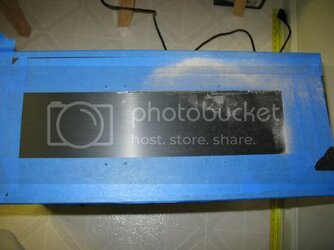
Cutting out the area for the radiator:
cutting2.jpg

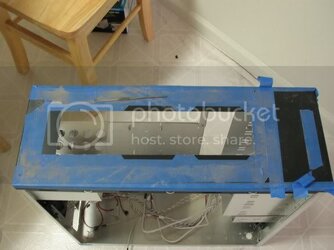
Then after that was done, masking out the cut out besides the screw holes:
masked.jpg
There will be another cut out over the last fan as well, I just want to cut the additional bit out near the end first.

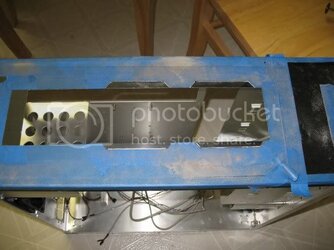
And getting to work cutting those out:
cutting.jpg

I've gone through about 8 different cutting wheels, and blew up one ( that was kinda scary, made me re-think getting real close to the wheel while I cut...). I'm typing this while I let my dremel cool, it gets awful toasty during these cutting sessions.

It's coming along, although I don't think I'll get to painting until it gets warmer out, so like april or so. But I figure I can do the UV stuff in here anyway, no way someones going to notice UV reactive overspray on the utility room walls anywho. My goal is to get the loop installed this weekend, then leave it running over the week. That way next weekend I can throw all the stuff into it and actually have a workstation again, yay! I've gotten so much more done now that I've got the urge to play some serious video games again, there's only so much stick fighter can do for such a problem.

Next up: Rad installed, loop in, letting it run/leaktest, UV paint on the window. Should be fun...
-Drew
 
Back