• Welcome to Overclockers Forums! Join us to reply in threads, receive reduced ads, and to customize your site experience!

Home made hard drive rack

Overclockers is supported by our readers. When you click a link to make a purchase, we may earn a commission. Learn More.

Navig

Senior Case Master
Joined
Dec 7, 2003
Hi all,

As part of my ongoing
Bench project, I decided to build a new version of my home made tool free hard drive rack.


Materials:
Aluminun L angle 1/2in x 1/2in
4 pieces, 16cm in length

Aluminum L angle 1/2in x 3/4in
2 pieces, 13cm in length
4 pieces, 16cm in length

Aluminum straight bar 1/2in
4 pieces, 10.5cm in length

Aluminum rivets and washers

6-32 Thumb screws


Tools:
Hand drill, cobalt metal drill bits
Center punch
Pop rivet gun
6-32 tap
Dremel tool--sanding drum and grinding bit
 
Last edited:
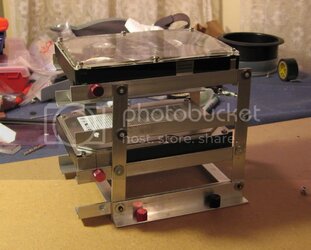
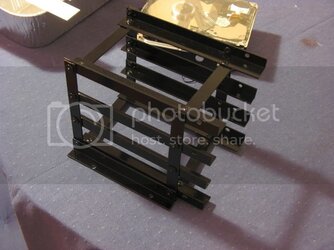
And here it is:


Harddrivecage1.jpg


Yes, you can buy pre-stamped racks for $20, but I kind of wanted to do it my way for the experience. Plus its to my specific specifications. Total cost about $15 in materials.


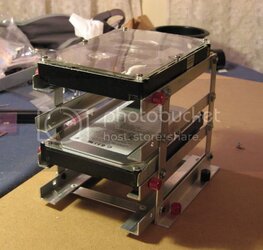
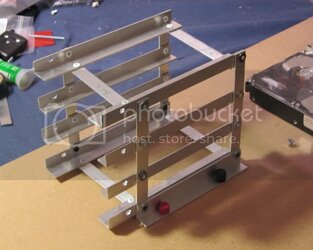
Harddrivecage2.jpg


Drives slide in from the left, stopping at the back by the last rivet. This lines it up for the thumbscrews to engage the mounting holes, tacking it into place.


Here's another view:

Harddrivecagewithdrives1.jpg
 
I plan on painting it black and using the red thumbscrews.


Here are my thoughts on the building process:

Always measure twice before cutting/drilling.

In fact, recheck fits after every change. Just putting in a rivet bends the metal a little bit, which can throw things off a bit. In fact the very LAST thing I did were the mounting holes for the thumbscrews to lock the drives in, because after riveting the thing together, the spots were off by 1-2mm.
 
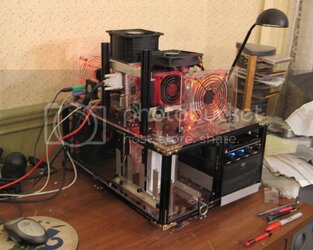
Thanks, if you look at my bench project, I can mount my fans anywhere I feel like. I think tho, that I will park it right in front of the psu fan and keep it cool that way.


Old hard drive rack:

Corsairbacktogether.jpg
 
ah, that looks sweet, i shoulda checked out the links in ur sig, i mean im one for noise, but having that delta...i cant even imagine :D
 
Actually, the delta isn't very loud. There are 2 independently powered 120mm fans in the housing (counter-rotating), and I keep them both around 1300rpm, so it sound just like 2x1300rpm 120mm fans--that is to say far from silent, but what most would consider fairly quiet. The gain is an amazing amount of pressure. On the other hand, I can crank them up to 3000+ rpms and have things fly around the room!


Sorry, the hard drive was broken even before I window'd it. It's just for show. But it looks nice, experimented a little with graphics--pic.
 
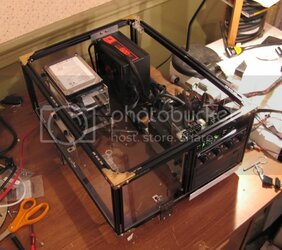
Ah, the beauty of a benching rig. Rearranged the components like so:


Harddrivecagerearrange.jpg
 
That's actually very cool! It looks like you put a lot of thought and work into it before actually starting with your raw materials. Impressive :)
 
I like it as well, do the drives have any vibration noise?

Before painting it, have you considered trying that plasticote stuff? Its a decent vibration dampener. If not that they make a weather stripping in 1/2" wide that you could lay down to eat some of that vibration up. Or some rubber grommets/washers where the thumbscrews attach.

Just some ideas, looks great
 
Not bad. But still a conventional layout. Personally I'd like to see some alternative mounting positions to help eliminate transfer of vibrations, airflow, & wiring.
 
I'm not much of a silent pc person, for goodness sakes look at the fan on my Big Typhoon. Hard drive clicking bothers me not at all.

The cage does vibrate with the hard drive, altho it doesn't seem to me to add any noise to the hard drive during virus scanning. The large acrylic sheet to which it is mounted, barely transmits the vibrations, even right next to the cage. Still, once I settle on a location, I'll mount it on neoprene washers.

Not bad. But still a conventional layout. Personally I'd like to see some alternative mounting positions to help eliminate transfer of vibrations, airflow, & wiring.

Any suggestions? It was fun to make, and I'm all for future revisions. This was rev2 as you can see from the first pic.

navig
 
That is awesome Navig, great work! I can't believe how much stuff you can do with the Lubic Kits. Hopefully I will be able to pick up a kit next month, keep up the good work :D
 
where'd you get the alu? I like your design and have been trying to make one myself, but cannot find L-shaped alu.
 
Back