• Welcome to Overclockers Forums! Join us to reply in threads, receive reduced ads, and to customize your site experience!

Ruhe NMP -[No Moving Parts]-

Overclockers is supported by our readers. When you click a link to make a purchase, we may earn a commission. Learn More.
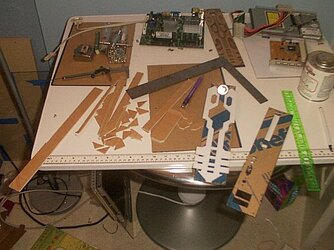
My room is extremely clean now after alot of work, but the garage can stay messy since it's still functional that way. All of the work involving the table saw is now finished, so all that's left for me to do now is detail work, drilling, and glueing. Everything left for me to do is measured and marked and I'll hopefully be able to get a significant amount of the remaining work done tomorrow morning before work.
nmp_8.jpg
The white front-panel sheet is the one on the left with all the marking on it, and all of the pen-shaded areas need to be cut out. The one on the right is a faceplate underside piece that I messed up the drilling on. The smaller pieces with 5 holes are the top and bottom venting panels.
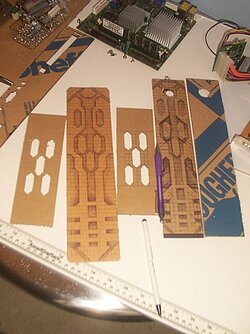
 
Graaaaaaaah! My hands hurt alot after having spent 6 hours cutting plastic with the scrollsaw today. Everything you see on the desk will be assembled, glued, drilled, and tapped in the next few days. I've very close to completing this case, then I can get all obsessive with the wiring and lights.
nmp_9.jpg
 
As usual all your projects blow me awy captain. I have no Idea how you manage to cut your plastic so well. I use a table saw and a compound miter saw and still can't get right angles :p. Oh well I guess its the practice you get form shurning out case after amazing case.


Keep up the good work I look forward to the final build.

Cheers Nick
 
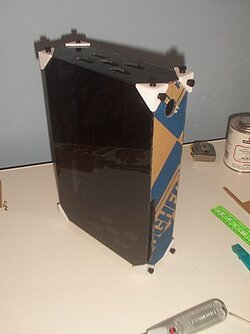
Alot of progress today.
As you can see, the case can now be put together in one piece.
nmp_90.jpg
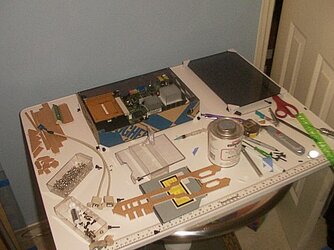
The case panels are done and I'm currently working on the slim DVD-ROM drive bracket which still needs to dry.
nmp_91.jpg
Things left to do
1. Drill mounting holes for DVD-ROM and it's bracket.
2. Buy the tiny screws for the DVD-ROM drive
3. Drill hard drive mounting holes
4. Mount the power supply PCB
5. Make nameplate
6. Glue the face and trim pieces on (last step)
 
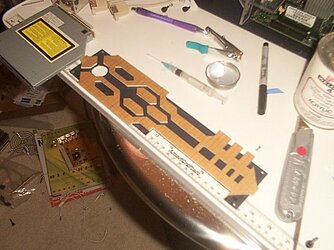
I finished the DVD-ROM drive bracket after finding the tiny screws I needed in my screw organizer.
The front trim pieces are glued and will need to sit overnight before I can peel off the protective paper. Then I can start adding the other trim pieces.
nmp_92.jpg

The only remaining hurdle now is figuring out a mounting mechanism for the power supply which has only one very very small mounting hole.

Magictoaster_v2 said:
As usual all your projects blow me awy captain. I have no Idea how you manage to cut your plastic so well. I use a table saw and a compound miter saw and still can't get right angles :p.
You just need an angle ruler and a plastic-specific blade for your table saw.
The angle ruler (also called a machinist's sqaure) is used to make sure that the cutting fence is at the right measurement for both ends of the blade (to ensure a straight cut).

And when cutting acrylic specifically use a high cutting angle (raise the blade up as high as you can safely put it).

The only other tools I've been primarily using for this project are a drillpress and scrollsaw. Everything else is the result of lots of time spent planning, measuring, marking, and remeasuring along the way.

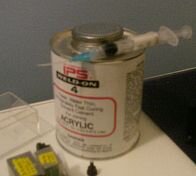
The one trick I have up my sleeve is IPS Weld-On #4 and a syringe (with a flexible IV butterfly tip) to apply it with.
nmp_93.jpg
You can buy IPS Weld-On products for most plastics shops or industrial supply catalogs, but I have no idea where to get the weird syringe from. I nabbed that from my Dad's medical supplies with his permission and it's been invaluable.
 
Last edited:
It's 80% black tint polycarbonate and it's just barely transparent. I used alot of it while making Mk.V and decided to get some more from the scrap pile at my local plastics shop. I now have a considerably large supply of it. :D
 
Sleep-deprivation Powers Activate! :eek:

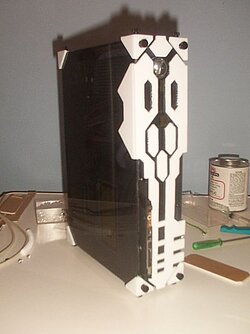
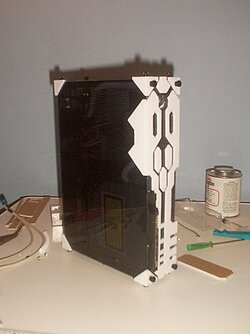
90% done
nmp_94.jpg
nmp_95.jpg
Left to do
1. File down DVD-ROM drive screws
2. Dye DVD-ROM faceplate black
3. Cut and glue remaining trim pieces
4. Make nameplate
5. Mount Power LED

I need to order some parts as well. The trim may cover only the motherboard side of the case because the DVD-ROM faceplate isn't flat enough for the pieces to be glued onto it. The only way I can think of to remedy this problem is to get another drive. :bang head
 
I too liked the look of the original more, but as I said before, this one looks great too.
I can't wait to see what it looks like when it's finished :)
 
Today was mostly interior work that you won't be able to distinguish from the outside, ecpet for one notable item. The Power LED! I can't make this a trip-the-light-fantastic machine because it's going next to a TV that people plan on watching so it has to be just enough to let everyone know that the machine is turned on (especially since it doesn't make any noise).

The fun starts when the lights go out
nmp_96.jpg
nmp_97.jpg
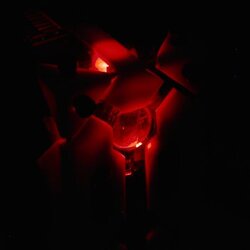
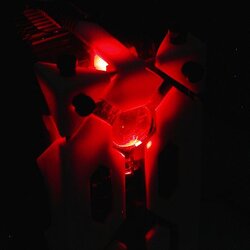
This was the most accurate picture I could take of the power LED illuminating the trim and the clear acrylic "eye".
nmp_98.jpg
And this was the most dramatic picture I could take.
nmp_99.jpg
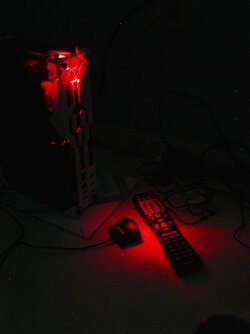
And as a parting shot (for now) here's Ruhe staring at the remote.
nmp_990.jpg

This machine is 98% done now. I just need to make the nameplate, paint/dye the drive faceplate, and then install the video card when it arrives.
 
Sweet!
Those were the kind of pictures I was looking for ;)
I love the depth you get with that LED, just the way it's got a center focus but still travels looks great!
 
I might add some really weak red LEDs to mildly illuminate the corners. I haven't decided on that yet though.
Maybe I'll just add another single LED on the bottom of the front.
:shrug:
I'll figure it out tomorrow night.
 
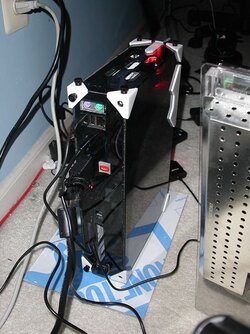
Haha, I just realized I never bothered to show the back of this machine.
nmp_991.jpg
There are two screws missing on purpose. They don't need to be there for structural support since the corner braces hold the back in place, and it saves me the hassle of having to undo 2 fewer screws when I need to remove the back.
The power/reset button is in the back to prevent prying fingers from turning this machine off. The PCI slot ended up being alot easier to do than I thought it would be. There's still (theoretically anyways) enough space inside to potentially install a full size hard drive should the need arise in the distant future.
 
This project is really neat.

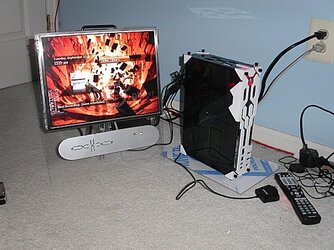
I liked both designs, I perfer the one it ended up becoming. One thing I noticed was it was a tiny creation. Then I seen the last pic and realized next to the cords, this thing is really tiny. I like the architecture of the detail. Very well thought out.

Your skill level keeps expanding. I look forward to seeing your next effort.
 
Back